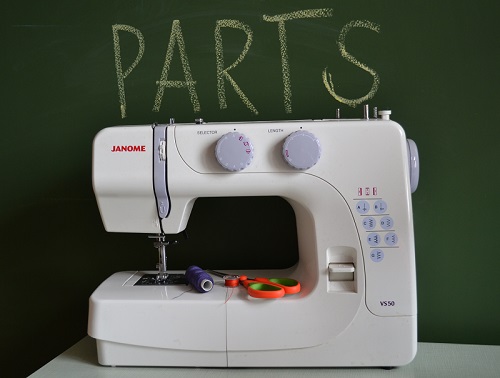
How to Use a Sewing Machine

If you are beginner you need learn this getting started guide of operating instructions and operation basics your sewing machine. Here is part two (continuation).
The first part of getting started guid you can find by clicking on this link:
Operating your sewing machine - part one.
Spool pins for thread coils

Spool pins are used for holding thread coils. Pull out the pin from top panel holding it by edge. If you will use big cone coils that are installed on table you can insert the thread into this hole also.
Note: On the left rod there is an opening in which you can insert very twisted thread.
The felt pad that is placed at base of the rod is used to noise reduction from coil rotation.
Winding a bobbin

1. Place thread spool on the pin and pass it between discs of bobbin winding tensioner.
2. Pass thread end through hole in bobbin sides from inside.
3. Place the bobbin onto bobbin winding shaft and slide the shaft to the right. Turn the bobbin clockwise, by hand, until spring on shaft slides into a slit on bobbin.
4. While holding thread end, gently press on foot controller to wind thread around bobbin a few times, then stop a sewing machine.
5. Trim excess thread sticking out from side of bobin and continue winding a thread onto bobbin by pressing down on foot controller.
Note: Sewing machine stops automaticcaly winding when a bobbin is full.
6. When sewing machine stops, cut thread between bobbin and spool, push this shaft to left and remove full bobbin from shaft.
Lower (bobbin) threading

Turn power switch to "O".
1. Raise a needle to its highest position by turning a balance wheel toward you (counterclockwise), and raise a presser foot lever.
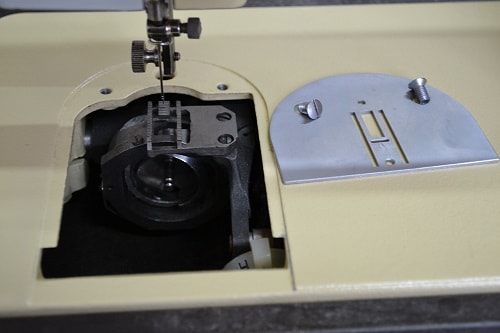
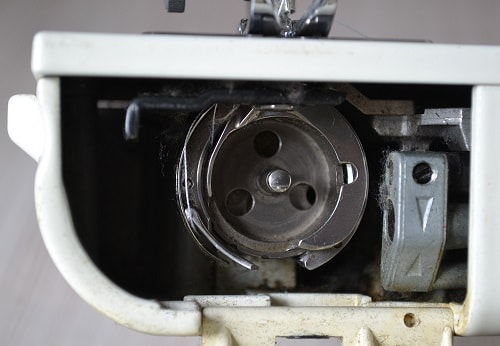
2. Open a shuttle cover behind an extension table on front of machine and remove a bobbin case by pulling its latch toward you and pulling it out from shuttle race.
3. Pull out 10cm (4") from a full bobbin and insert the bobbin into bobbin case. Pull the trailing thread into the slot, down and to the left, until it enters the delivery eye under the tension spring.
4. Holding the bobbin case by the latch, fully insert the bobbin case into the shuttle race and release the latch. Make sure the bobbin case finger fits into the notch at the top of the race.
Note: If the bobbin case is not properly placed back into the machine, it will fail out from the shuttle immediately after starting to sew.
In this video YouTube, you will learn how to thread a sewing machine bobbin.
Upper (needle) threading

1. Raise the presser foot using the presser4 foot lifter and turn the balance wheel toward you (counterclockwise) to raise the thread take-up lever to its highest position.
2. Pull up the spool pin and place a spool of the thread on this pin.
3. Pass the thread through both threads guides: the rear one first, then the front one.
4. Pull the thread down and around the upper tension control dial from the right to the left so the thread picks up the thread check spring. While holding the thread, pull it between the tension discs.
5. Guide the thread to the back of the thread take-up lever and around to the left. Bring the thread through the slit by pulling it toward you and into the eyelet.
6. Bring the thread down and pass it behind the thread guide.
7. Thread the needle from front to back and pull out about 5 cm (2") of thread.
Note: If the thread is incorrectly fed, the thread may break, cause stitches to be skipped or cause the fabric to wrinkle.
See also: How to thread a sewing machine.
Pulling up lower (bobbin) thread

1. Raise the presser foot and the needle to their highest positions.
2. With your left hand, hold the end of upper thread. With your right hand, turn the balance wheel toward you (counterclockwise) until the needle moves down and back up again to its highest position.
3. The upper thread should have caught the lower thread in a loop. Pull the upper thread toward you and the lower thread will come up from the bobbin in a large loop.
4. Pull out about 15cm (6") of both threads and place them toward the back of the machine straight behind the presser foot. The upper thread should pass between the toes of the presser foot.
See also: Bobbin and top thread problems.
Twin-needle (double needle) sewing
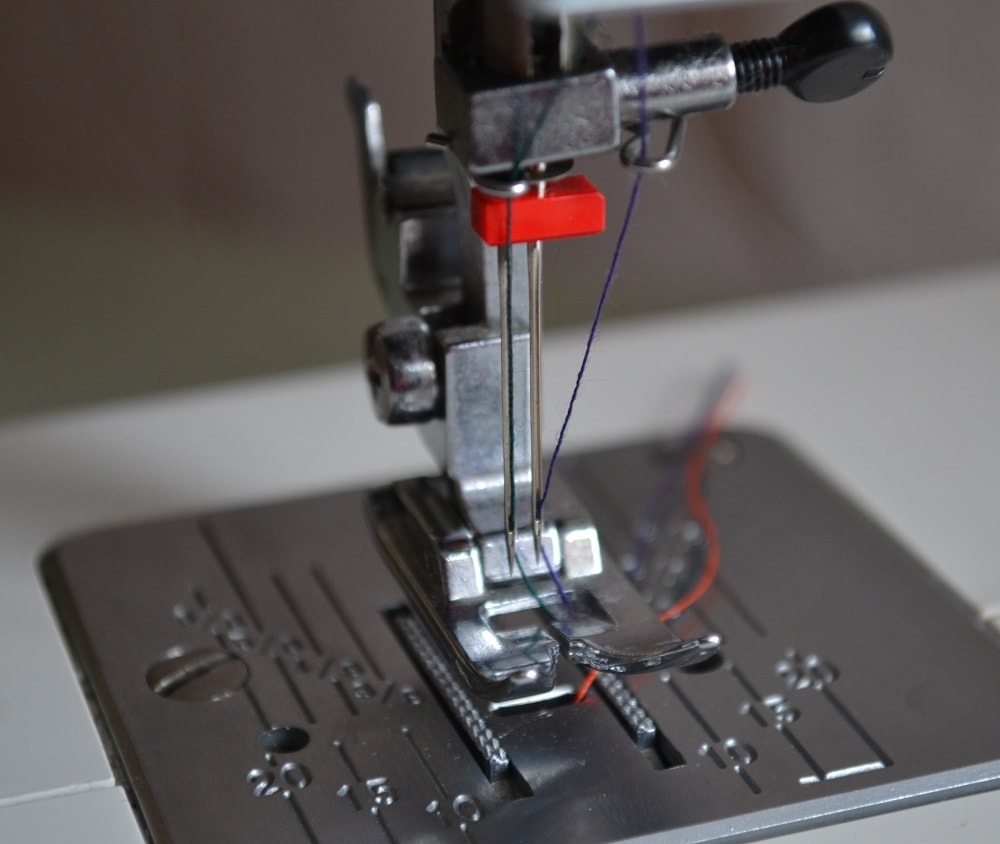
You sewing machine is designed for twin-needle sewing which allows you to sew using two upper threads. You can use the same color or two different colors of thread for decorative stitches.
Twin-needle sewing works well with the straight stitch only.
Be sure that the two upper threads used for threading the twin needle have the same weight. If the threads do not have the same weight, the stitching may not be consistent.
Insert the twin needle in the same way that a single needle is inserted. The flat side of the needle should face toward the back and the rounded side should face toward you.
Place the extra vertical spool pin in a hole found on the top right-hand side of the machine. Place the second spool of thread on this pin.
Each needle should be threaded separately.
Threading the right needle follow the same instructions for single needle threading.
Thread the left needle in the same way as the right needle was threaded, but do not pass the thread through the thread guide above the needle before passing it through the eye of the left needle.
See also: How to use a twin or double needle.
Can you use a twin needle on a regular sewing machine? How do you use a double needle? What is twin needle stitching and how does a sewing machine needle work? In this video you will know how to use a twin needle on your sewing machine.
Pattern selection dial

Pattern selection dial is needed to select a kind of stitch. To select kind of stitch you need lift up the needle at first. Then simply turn the dial in either direction combining the mark on the body with the label on dial.
Caution: Do not turn the stitch selection knob if the needle is in the fabric. The needle can break or bend.
Stitch length selector

Stitch length selector knob is needed for selection stitch length. The larger the digit on the selection diac, the longer the stitch will be.
Correct balance of upper and lower thread tension

Thread tension will affect the quality of your stitches. It may need to be adjusted when you change fabric or thread type.
Note: It is recommended that a test sample be made on a fabric scrap before sewing on your project.
The basic thread tension setting is "4-5".
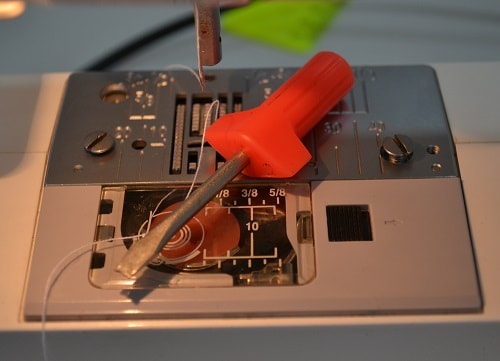
Correcting the bobbin thread tension

The bobbin thread tension has already been adjusted at the factory for general use. For most sewing applications, no adjustment is needed.
When sewing with thin thread on thin fabrics, the thread tension may not be adjusted adequately with the upper tension control dial. Therefore, the thread tension must be adjusted according to the procedure described below.
Locks appear on the surface of the fabric. Decrease the thread tension by turning the dial to a lower number. If the result is still not satisfactory, then adjust the bobbin thread tension.
Increase the tension in the bobbin by turning the screw with a small screwdriver in a clockwise direction. However, do not turn the screw to its original setting before starting your next project.
Correct tension is important since too much or too little tension will weaken your seams or cause puckers in your fabric.
In this video you know how to change the presser foot on a sewing machine.
Getting Started on the Sewing Machine
The getting started guide on the sewing machine. Sewing technique of making the straight stitching for beginners.
Principal Parts of Sewing Machine
If you are beginner you need learn this getting started guide on your sewing machine having many color photos with tailor's comments.
How a Sewing Machine Works
Here is the tutorial how to construct and work home model of the zigzag sewing machine.
Vertical Rotary Shuttle Hook System
Sewing machines middle and upper classes have a rotary vertical or horizontal hook system. Here you can read how works vertical rotary hook and tips for repair it.
Tips For Choosing A Sewing Machine
A few key features of sewing machines that you need to know necessarily.
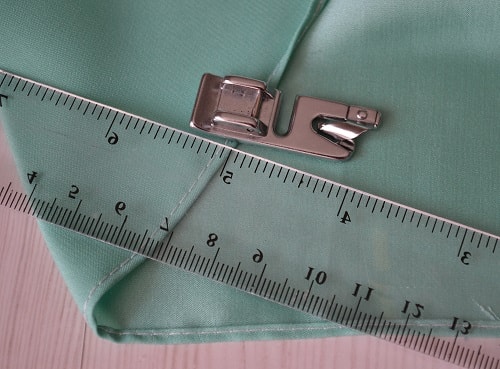
Rolled Hem Presser Foot Tutorial
Using the rolled hem presser foot you can hem thin fabric easily. The tutorial has 10 photos with pro comments.

Tips for Using a Serger
If you have an overlock sewing machine you need learn these tips on how to use your serger. All tips are from a professional tailor.
Tips for Using your Sewing Machine
If you need to learn tips from tailor read this post. Here you find top tips and tricks how to use your sewing machine.