Drafting Womens Pants Pattern (Basic)

If you will draft this pattern of womens pants you will have a basic pattern which can be used for sewing any others models trousers, including the jeans, shorts etc.
This is free basic pattern of classic women's trousers that can be used for modeling of women's pants.
Many changes in the pattern can be made directly on the fabric, correcting them during the fitting.
It's easy to make additions to this pattern if you want to sew summer pants with an elastic band, trousers with a belt-coquette, etc.
Using this basic pattern you can to build different types of pockets and even you can use it for sewing a skirt-trousers.
This pattern can be useful for sewing of boy's or girl's trousers also.
Basic Frame for Pants Pattern
There are many patterns drafting system of women's classic trousers, but they all require a fit during the sewing. Do not expect to find the perfect pattern for your figure. Using the pattern for the first time I recommend to leave large allowances on the seams.
Note: You will detect the discrepancy of some lines in this drawing and in your pattern. This is normal, because you use your own measurements.
Take a graph paper roll and draw a frame first.

To create a drawing of the pattern of female trousers, you first need to build a grid. To make navigation easier in the drawing, the pattern is done in two stages.
First, draw a vertical line, along the left side of the graph paper (paper with a millimeter marking) and mark the topmost and leftmost point of W (waist line).
Set aside the measure of the length of the trousers and put the point L (length).
Now you need to measure the height of the seat (crotch), as shown in the photo below, and postpone this segment on the vertical line, down from point W.
Usually this measurement is 24-25 cm for 42-44 size and 25-26cm for 46-48 size. But you can specify it according to the instructions below. Put the point C (Crotch).
This point needs to be clarified. The fact is that practically on all the patterns that you will find on the Internet, there is another scheme for building trousers. Here I offer you my own methods of drafting womens pants pattern, which I teach to my pupils in sewing courses.
The horizontal line along point C will correspond the buttocks, the greatest circumference of the female figure.
The hips line will pass a little higher above the point C. Its position is calculated using this calculation :
HC = WC : 3. Calculate your value and put point H (Hips).
Now, from point H mark the point H1 using such calculation: Divide the desired hips circumference by 4.
From this point (H1), draw down a vertical line (up and down) and mark two points C1 and W1.
Now basic frame of pants pattern has the main lines and points, from which we will draft others. And the first of them will be the point C 2.
The segment C1C2 is equal :
1/2 of Hip measurement needs to divide on 10. This segment is 4-6cm usually.
Next we will build the knees line and mark with point K (Knee). To find this point, you need to divide the segment WL (from waist line to hem line) in half, into two equal parts.
How to Calculate Crotch Line Position (WC)

The measurement of height of the seat of trousers (crotch) is very important for the exact construction of the pattern of women's pants. Look at this photo. Here shows how to find crotch line correctly without formulas, in a practical way.
First tie the waist with an elastic band.
Then you need to sit on a flat stool.
Now you can measure the segment from the surface of the stool to the natural waist line.
Note: Don't lay the tape along the body. This segment should be reflecting the distance in a straight line.
Do not make a mistake during measuring the height of the seat. If this measurement will be too large, then the pants will "hang". Such defect will be impossible to correct.
Front Part of Womens Pants Pattern

Now more complex calculations will begin. There will be a lot of designations and lines in the drawing, so the lines and letters for the front and back will be made in different colors.
So, let's find center line of front half of the trousers. Along these lines on both front parts will be sewn the darts of trousers.
To do this, we need to divide the segment CC2 into two parts and put the point C0.
Note: All letters with "zero" have a zero value and are located in the middle of the front part of trousers pattern.
From point C0 draw vertical line up and down. At the intersection with the upper (waist) and lower (hem) lines mark the points W0 and L0.
Draw the point K0 (knee line) also.
Now you need to slightly to lower the waist line from the point W1. W1 W2 = 1-1.5 cm, depending on the bulge your abdomen. If you have very protruding belly, mark this point more than on 1.5 cm.
In addition to this you need know, the new W2 point should be shifted to the left by 0.5-1 cm, but only if the difference in the measure of the waist (full circumference) and hip (full circumference) is more than 20 cm.
If the difference is less, it should not be shifted.
Well, now you need to calculate the offset of the side seam along the waist line, which will be indicated by the point W3.
To find this point you need draw straight line from new point W2 to W.
Now you need calculate :
To 1/2 of waist measurement add 1.5 cm. This result is needed to divide on 2 and add 2-2.5 cm (width of front dart).
The depth of the dart is 10-12cm.
Note: Above the dart is needed to draw the waistline slightly upwards, as shown on my drawing. If this line will be straight, during sewing the dart together it will necessarily fall below the waist line.
Now let's draw curve line where will be sewn the zipper fly with an invisible zipper.
Draw it approximately, without using any formulas. Take a tailor's special template and join the points W2H1C2, as shown on my drawing. In any cases, this line can be adjusted during the fitting your pants.
Similarly, we need connect the point W3H, either by using the templates or by hand.
Now we pass to drafting the bottom line (hem) of female trousers pattern.
Line segment L1L2 Is calculated as follows: Full measuring the hemline needs divide in half. From the received value it is necessary to take away 1 cm, because front part of pants is a little narrower.
Note: L0L1 = L0L2.
If the width of the trousers in the knee area is known, then we calculate by the same formula, only using the knee measure.
Now it is time to connect points H, L1 by a straight line. At the intersection with the knee line you need put the point K1, followed by K2. K1K0 = K0K2. Note: In the center of each segment HK1, K2H2 you need back off 0.5-1cm and draw new smooth contours, as shown.
Well, now you took the last stage of drafting the pattern of the front part of women's pants and it's time to draft back part.
Back Part of Womens Pants Pattern

Blue was used for marking the lines of the pattern of the back half of the trousers. The points are marked in red in the pattern.
Let's draft the pattern with marking the point H2, according to the calculation: HH2 = (1/2 of hips measurement) - 1.5cm.
Next, mark the points K3 and K4, using the following calculation :
K1K3 = K2K4 = 2 cm.
In the same way you need mark the points of width of the pants bottom :
H1H3 = H2H4 = 2 cm.
We connect the points L3 and L4 to the points K3 and K4. Next we join K3 with H2 and K4 with C3 by straight lines.
At the same time, from point K3, through point H2 you need continue straight line up, above the waist line on 10 - 15 cm.
Note, that the new point W4 is just above the waist line of front part of women's pants. Position of point W4 is determined using this rule HW3 (curve line) = H2W4 (straight line).
Note: It is necessary measure segment HW3 along curve line with flexible tape.
Let's now switch attention to the hip line and build a key point H3 using the calculation: H2H3 = (1/2 of hips measurement + 2cm) : 2.
From new point H3 is necessary to draw a perpendicular line 3-5 cm long (depending on the size of circumference of your hips) and put the point H4.
Now you can connect both points C1 and H4 together. Using the ruler you need continue this straight line up, as shown on drawing.
Now, from point W4 restore to the right a perpendicular (with triangle ruler).
As a result of the intersection of two straight lines, we obtained the point W5. From this new point (W5) you need to draw to the left a straight line having length:
W5W6 =((1/2 waist measurement + 2 cm) : 2) + 3 - 3.5 cm (width of back dart).
Now we need to draft a dart on the back half of the trousers.
First, needs to divide the segment W5W6 in half.
Now you need to draw (from center point) a perpendicular using a triangle ruler.
The back dart is 12-14 cm long and full width is 3 - 3.5.
Next, you need to draw the outline of waist line and dart, taking into account the smooth bending and lifting the line to the edges of the dart, as shown in the drawing of my womens trousers pattern.
Now let's move on to the knees line. As already was noted, K2K4 = L2L4 = 2cm. Therefore, connect the points L4K4 and K4L3 by a straight line.
Further in the middle of the segment K3H2 put a point and move away from it inside the pattern by 1.5 - 2 cm and mark it.
That's all, the drafting of the womens trousers pattern is almost finished, it remains only to find the point C3, using this calculation :
C1C3 = (1/2 of hips measurement : 10 ) + 3 cm.
Then, from the middle of the segment C3K4 you need to move at left 1.2-2cm. Draw through the resulting point a smooth line, as shown.
Immediately draw new contour line along section K3H2 (on the other hand), only inward it is necessary to retreat a little more, about 1-1.5cm.
A little bit below the point C3 we need to mark the point C4. To determine its position, it is not necessary use calculation, just back down on 1.5-2 centimeters.
Using this new point (C4) we need now make the last step - draw the seam of the seat, as shown.
Note: After drafting pants pattern do not forget to add seam allowances!
Drafting Dress Pattern (Basic)
If you will draft your own dress pattern you need use this tutorial. Make this basic dress pattern which and you can to build patterns of any other dress models.
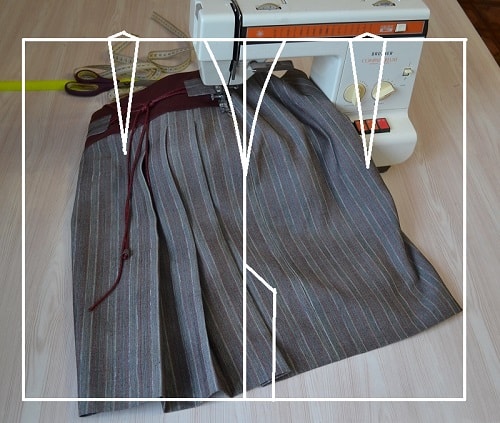
Pencil Skirt Pattern and Tutorial pdf
In step-by-step photo tutorial you find simple and understandable steps that will help you to build a pencil skirt pattern correctly and easily.
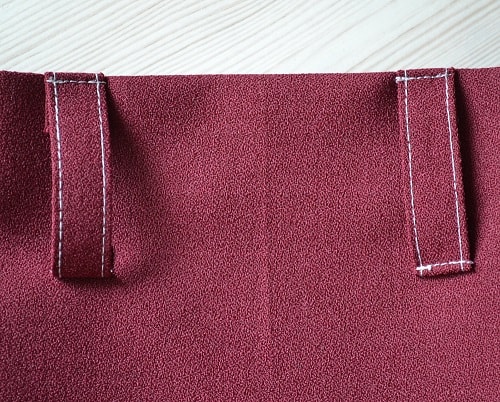
How to Make Belt Loops for Trousers
Learn how to make the belt loops for trousers. Using this sewing technique you can sew belt loops for skirt also.
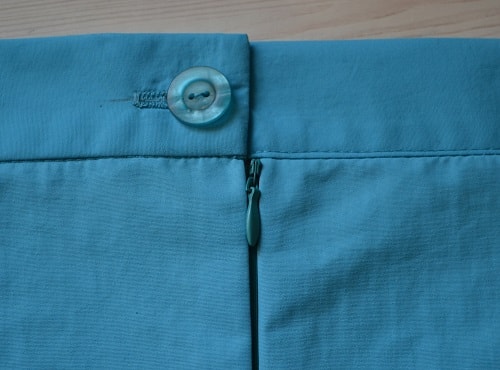
How to Make Waistband with Buttonhole
Learn how to add the waistband to the waist line along. This is waistband with buttonhole and zipper step-by-step technique.
Free pattern of straight skirt
In this tutorial you learn how to draft the pattern of the straight skirt. This free method is used to draft any size patterns of skirts.
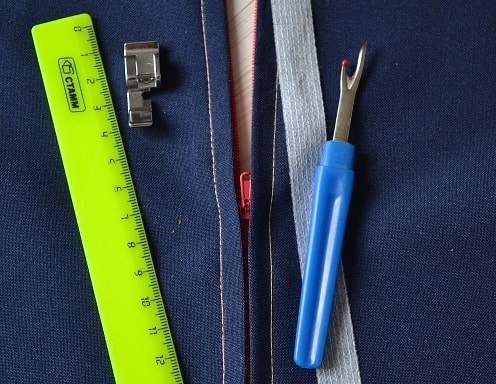
How to Sew a Centered Zipper with a Sewing Machine
Using this tutorial you will learn how to install a centered zipper on sewing machine using a special zipper presser foot.
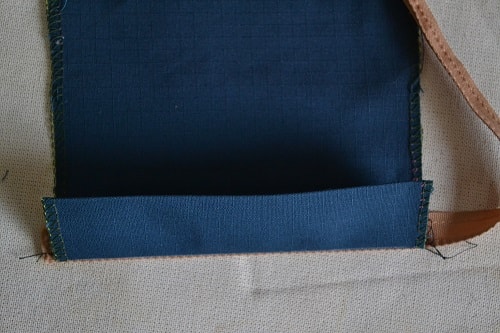
Sewing the Front Jeans Pockets
This is the tutorial how to sew front jeans pockets. This sewing technique helps making the front skirt pockets also.
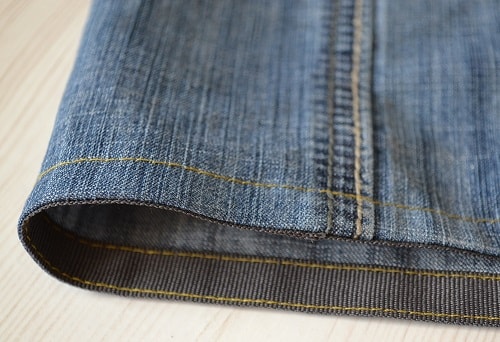
How to Hem Jeans with Kick Tape
Here is the simple and easy way how to hem jeans on sewing machine with the trouser kick tape around bottom.
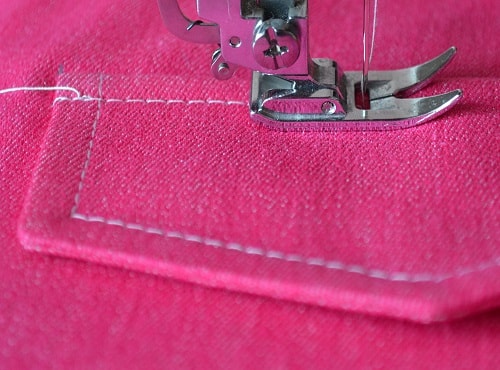
How to Make Decorative Pocket Flap
Here's a pro tutorial on making the pocket flap. If you need to sew flat pocket these sewing tips help you do it correct.
How to Make the Pants Cuff Tutorial
The cuff is best way of hemming boys trousers. If you cannot sew cuff pants correct you can use this step-by-step sewing tutorial.